
How to Build a Sandbox: Step-by-Step (No Rot)
This post contains affiliate links. As an Amazon Associate, we earn from qualifying purchases.
To build a sandbox, you need four things right: a footprint sized to the kids using it, a frame that drains instead of holding water, a base that blocks weeds and burrowing, and the correct sand depth. Get the drainage or the base wrong and the frame rots from the inside out.
Rot starts at the bottom of the frame, where boards sit against wet ground and never dry out. A box that holds water after a rain fails at the base long before the top rails show any wear. That is why the first hour of this job goes into the layers nobody sees.
What follows is the how to build a sandbox order I use: footprint math, the base layers, a frame that drains, the sand itself, and the cover that keeps the whole thing usable. Numbers first, reasons after.
Key Takeaways
- Size it for one age band. A 4 x 4 box suits two toddlers; a 6 x 6 suits two diggers who want to reach the bottom.
- Dig before you build. Washed gravel under woven fabric is what keeps water and weeds out of the sand.
- Aim for 4 to 6 inches of sand. Deeper is hard to dig through, and shallower gets scraped to the liner in a week.
- Put the drainage in the frame, never in the liner. A sealed bottom turns the box into a bathtub.
- Cover it every night. An open box is a litter box, and that is one problem you cannot clean your way out of.
Pick the Footprint Before You Buy a Single Board
Four feet square handles two toddlers at once, and that is where I start almost every build.
A sandbox footprint is measured from the inside face of the frame, not the outside. Sand volume calculations use that interior dimension, so a box framed with 2×8 lumber loses 1.5 inches of usable width on each side to the board thickness. That difference matters when ordering sand by the bag or by the truckload.
| Age Band | Interior Footprint | Sand Depth |
|---|---|---|
| 1 to 3 years | 4 x 4 ft | 4 in |
| 4 to 6 years | 5 x 5 ft | 5 in |
| 7 to 10 years | 6 x 6 ft | 6 in |
The temptation is one big box for the whole family. I have watched that fail in backyards. A 6 x 6 pit is too big for a two-year-old and dull to an eight-year-old, so the two of them spend the summer negotiating instead of digging. Kids vote with their feet.
Two smaller boxes at different age bands get used far more than one compromise pit.
Placement matters as much as size:
- Keep it inside a sightline from the kitchen window or the patio.
- Keep the sandbox clear of a swing’s travel path.
- Pick the north or east side so afternoon shade lands on the sand.
- Avoid the low spot in the yard. Water pools there and the sand stays wet for days.
If you want to see the other shapes before you commit, the types of sandboxes split into in-ground pits, raised boxes, and table-height units, and each one changes how much digging you do.
If you would rather skip the saw work entirely, the Little Tikes Turtle Sandbox ships as one molded piece and needs nothing but a level patch of ground. The sandpit is a standard park feature, and the basic form has barely changed because it works.
Dig, Line, and Drain: The Layers Under the Sand
Skip the base in how to build a sandbox and you will rebuild the box sooner than you expect. I have done that once, and I am not doing it again.
Before you start: A wet 4×4 frame section is heavier than one person should carry alone, so plan on two adults or a hand truck. Call 811, the national dig-safety line, before the first shovel strike, because irrigation runs and buried cable sit exactly where a sandbox wants to go. Cut pressure-treated lumber outdoors and wear eye protection, since the sawdust irritates eyes and lungs.
Where does your yard send water after a storm? If you cannot answer that, dig a test hole before you order lumber.
Layer 1: Mark, Dig, and Tamp
- Stake the interior footprint, not the outside edge. Marking the outside leaves the frame sitting proud of the hole on all four sides, and the base never lines up.
- Dig below grade across the whole footprint. Digging only to grade leaves no room for gravel, and the frame ends up resting on bare, wet soil.
- Overdig on each side for the frame. Skip this and you will be chipping at the hole edges with a trowel while the frame is half in.
- Tamp the bottom flat with a hand tamper. Untamped soil settles unevenly under the gravel, and the frame racks out of square within one season.
- Set a fall across the footprint, running away from the house. A dead-flat bottom holds water in the middle, and the middle is where the kids dig.
- Lay washed gravel, then woven fabric over it. Pea gravel rolls and never locks together; spun fabric clogs with silt and stops draining.
Layer 2: Gravel, Fabric, and the Drain Path
- Washed gravel, not pea gravel.
- Woven landscape fabric over the gravel, seams overlapped.
- A perforated drain sleeve to daylight if your yard already holds water.
The gravel does two jobs at once. It gives water somewhere to go, and it breaks the capillary path that pulls soil moisture up into the bottom board. Fabric alone does neither.
Water always wins.
If your yard ponds after every storm, sandbox drainage needs a real outlet rather than a gravel layer.
Easy to miss: Bedding the bottom rail down into the gravel. Water wicks straight into the end grain, and end grain is where rot starts. Set the frame on top of the fabric instead.
How Much Sand Does a Sandbox Actually Need?
Sixteen square feet at four inches deep takes about 5.3 cubic feet of sand. That is the whole calculation.
Interior square feet multiplied by depth in feet gives you cubic feet:
- 4 x 4 ft at 4 in: 16 sq ft x 0.33 ft = about 5.3 cubic feet
- 5 x 5 ft at 5 in: 25 sq ft x 0.42 ft = about 10.4 cubic feet
- 6 x 6 ft at 6 in: 36 sq ft x 0.5 ft = 18 cubic feet
Bagged sand is sold by weight, so read the coverage printed on the bag instead of assuming one bag equals one bucket. I buy a little over the math every time. Sand settles, and a fair amount of it leaves the box on shoes and in pockets.
Sand volume scales with the square of the footprint, so a 6 x 6 box holds more than twice what a 4 x 4 holds at the same depth.
Dry play sand hisses under a rake. Wet sand goes quiet and clumps, and a box that stays wet has a drainage problem, not a sand problem.
Frame, Lumber, and Hardware: Where Sandboxes Actually Fail
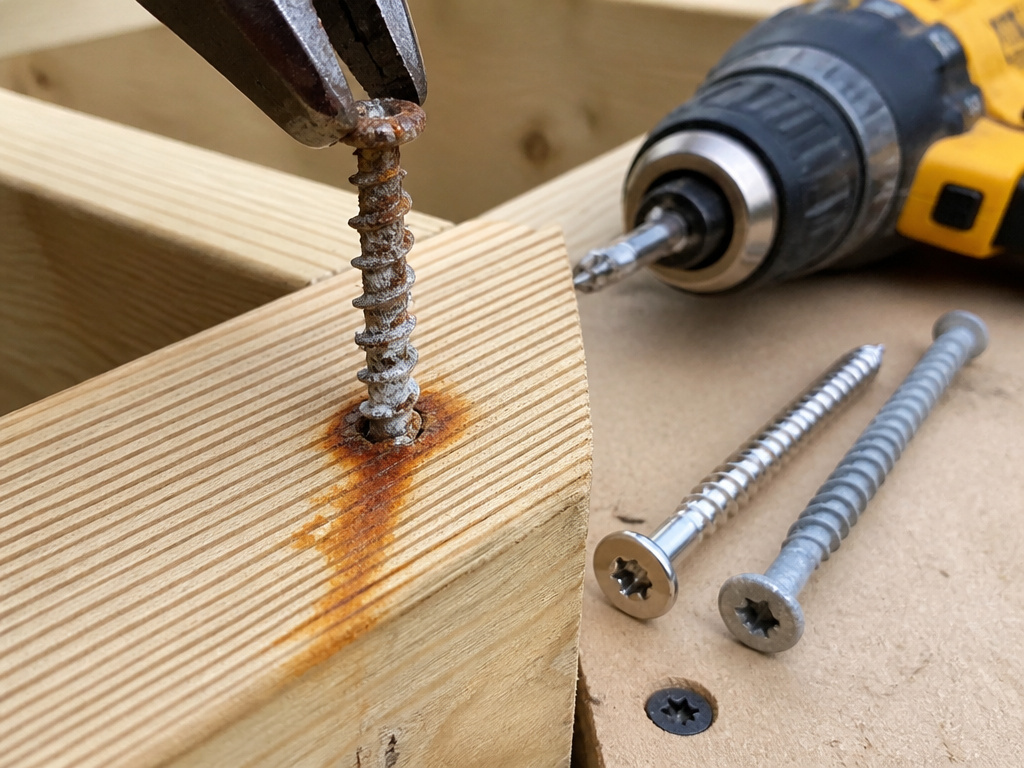
Hardware fails first. Every time.
I have pulled frames apart where the cedar was still sound and every screw was a stub of rust. The board outlives the fastener, and the fastener is what holds the box square.
| Material | Rot Resistance | Watch Out For |
|---|---|---|
| Cedar | Naturally resistant, no chemical treatment | Soft enough to dent under a shovel |
| Pressure-treated pine | High, when rated for ground contact | Sawdust needs eye and lung protection |
| HDPE composite board | Will not rot or splinter | Expands in heat, so use slotted holes |
Fasteners: Stainless or Nothing
Use stainless steel or hot-dipped galvanized screws rated for ground contact. Zinc-plated deck screws are common, and they are a reason backyard boxes fail. The copper in modern treated lumber attacks the zinc coating, and the chalky white bloom on the threads shows up before the head ever strips.
Fair warning. That is the one substitution that costs you the whole frame.
Where this goes sideways: Reusing the screws that came in a cheap kit. Kit hardware is often zinc-plated, and once the coating goes you get a rust streak down the cedar.
Why the Bottom Board Goes First
Assemble the frame square on a flat surface before it goes anywhere near the hole, and check the diagonals. Then set it on the fabric, above the gravel.
Fresh cedar smells sharp and resinous. Pressure-treated pine smells like a wet dock until it dries out completely.
If you are still weighing materials, the wooden vs plastic decision usually comes down to whether you want to repair the box or replace it. Pre-cut cedar kits from Backyard Discovery and KidKraft save you the saw work, though you should still open the hardware bag and check it.
What Sand Belongs in a Sandbox?

Quikrete Play Sand and Sakrete Play Sand are the two bags you will find at most home centers, and both are washed and screened.
Washing removes the fine dust fraction. Fine dust is the part that hangs in the air when a kid drops a shovel load from shoulder height.
- Washed play sand is the default. Quikrete and Sakrete both sell it bagged and by the pallet.
- River sand is coarser and better for real digging, but check a load for clay and silt before you commit.
- Colored sand looks great for a season and stains hands for a day.
- Polymeric sand belongs nowhere near a sandbox. It is designed to harden, and a hardened surface isn’t a sandbox.
Skip builder’s sand. It is cheaper, and it carries the dust you spend the summer trying to keep out of the air.
I have never had a parent complain about washed play sand. For most boxes, play sand is the right answer, and the argument is really about how much dust you are willing to live with.
Fresh sand on top of old sand fixes nothing. Sand doesn’t lock into a solid layer, so the old sand works its way back to the surface. Empty the box, then refill it.
The Lid, the Cover, and the Cat Problem
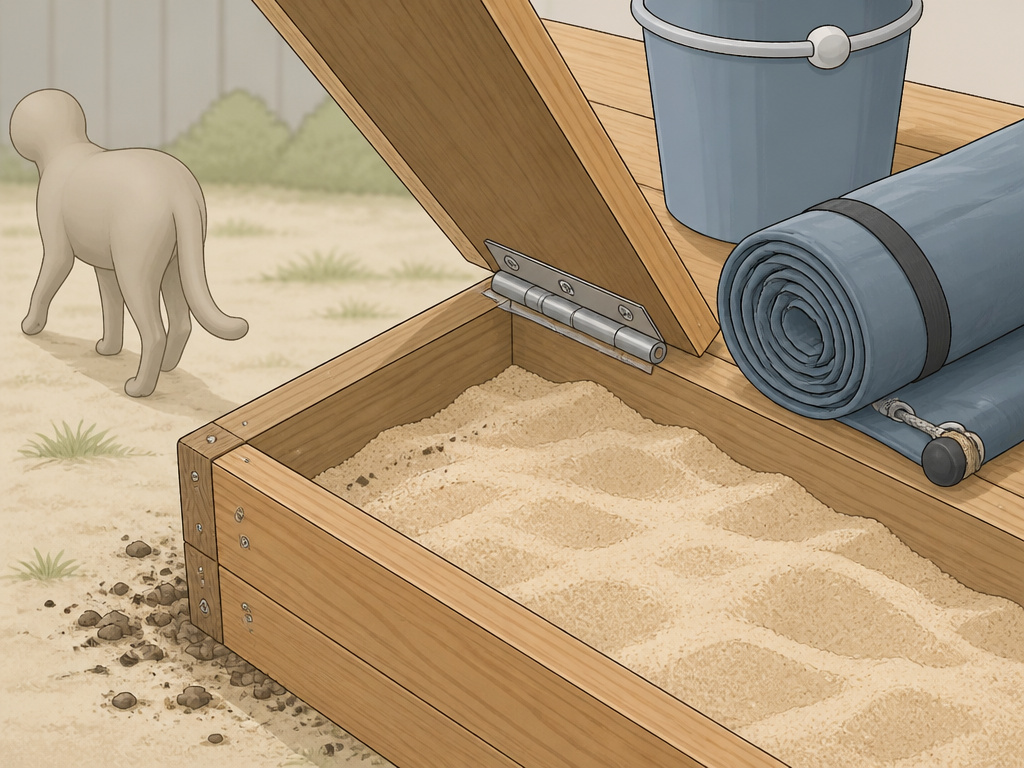
You walk out on a Tuesday morning and the sand has been rearranged into small piles, with a couple of dark clumps near the corner.
That is a cat. I have cleaned out more of these than I want to count, and it is the most common reason a sandbox gets abandoned. A lid solves it, and the same lid keeps rain out, which keeps the sand loose.
A sandbox with a lid does three jobs at once: it keeps cats out, keeps rain out, and gives you somewhere to set the bucket.
Cover options, ranked by how well they hold up:
- Hinged wooden lid. It can double as a bench.
- Roll-up vinyl cover. Weigh the edges down so it stays in place.
- Mesh screen. It lets rain straight through, so it solves half the problem.
- Nothing at all. After a while you are cleaning the box instead of using it.
The Step2 Naturally Playful sandbox line ships with a fitted lid, and that lid is the feature that matters most if you would rather buy than build.
Ever had to empty a whole box because of one cat? Keeping cats out of a sandbox usually comes down to a lid or a motion-triggered sprinkler, and the sprinkler soaks the kids too.
The part nobody mentions: A tarp thrown over the box traps condensation underneath. Pull it back and you will find a wet ring of sand and a dark film on the liner.
Safety Checks Before the First Bucket Goes In
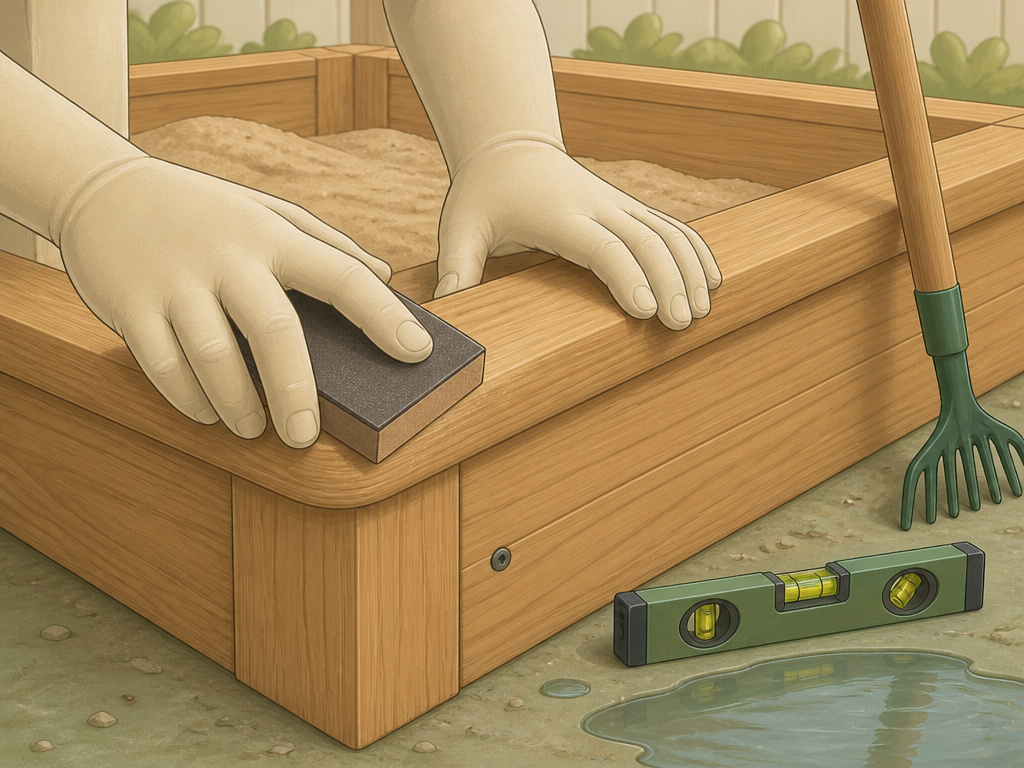
Two checks matter more than the build.
- No hard edges inside the play area. Cap the frame rails or sand them round.
- Keep the box clear of a swing’s travel path. A kid on a swing doesn’t look behind them.
- Check for standing water after the first hard rain. If it is still there the next morning, your drain path is blocked.
- Rake it weekly. A quick rake turns up anything a cat left, plus the toy that has been buried since April.
Do you know which way your yard slopes? I check this on every install, and it decides more about a sandbox than the lumber does.
For the toddler version, sandbox safety starts with depth and supervision rather than with the frame.
If you bought pressure-treated lumber, ask the yard what preservative it uses and whether it is rated for ground contact. A yard rated for ground contact answers that without blinking.
The CPSC playground safety guide covers surfacing and fall zones for everything else in the yard. It is worth ten minutes before you pour gravel for anything taller than a sandbox. If you are adding a climbing frame alongside it, look for equipment carrying IPEMA certification, which means an independent lab tested it against the ASTM playground standards.
Frequently Asked Questions
How deep should the sand be in a sandbox?
Four to six inches is the working range. Four inches is plenty for a toddler who mostly sits and scoops. Six inches suits a kid who wants to dig to the bottom, which is the whole point of a sandbox at that age.
Do I need to put anything under the sand?
Yes. Washed gravel under woven landscape fabric. The gravel gives water somewhere to drain, and the fabric stops weeds and burrowing insects from coming up through the sand. Fabric alone traps water and turns the box into a mud pit.
Can I use builder’s sand instead of play sand?
You can, and you will regret it. Builder’s sand is cheaper and much dustier, and the dust is the part that hangs in the air when kids dig. Washed play sand keeps the air clearer, which matters more than the savings.
How do I stop the sand from turning into mud?
Fix the drainage first. Water that cannot leave the box will soak whatever you pour in. Check the gravel layer, confirm the fabric is woven rather than spun, and make sure the frame has a path for water to escape.
How often should I change the sand?
There is no agreed schedule for changing sand. There is no agreed rule on this, so treat any firm schedule as a guess. Replace it sooner if the sand stays damp, smells sour, or has been used by cats.
The Bottom Line
Here is the first thing to do this week. Drive a stake at the corner where you think the box should go, then walk to the kitchen window and check whether you can see it. If you cannot, move the stake.
One threshold worth remembering: if your yard holds water for more than a day after a hard rain, gravel alone will not save the frame. Run a drain line to daylight before you build, or build a raised box instead. That single test decides more than any choice of lumber.
If you want one answer and a normal backyard: a cedar box, stainless hardware, gravel and woven fabric underneath, a lid, and washed play sand. That covers the large majority of families.
Everything above assumes you are building for one age band. If you have a two-year-old and a nine-year-old, build the small box now and add the big one later. I know that means two builds. I have never once seen the single giant box work out better.
Start with the ground under their feet. The frame is the easy part.
